Welcome to the Vaillant Ecotec Plus 831 user manual. This guide provides concise instructions for installation, operation, and maintenance of your heating system. Follow the steps carefully to ensure optimal performance and safety. This manual also covers troubleshooting tips and warranty safety for.

Safety Information

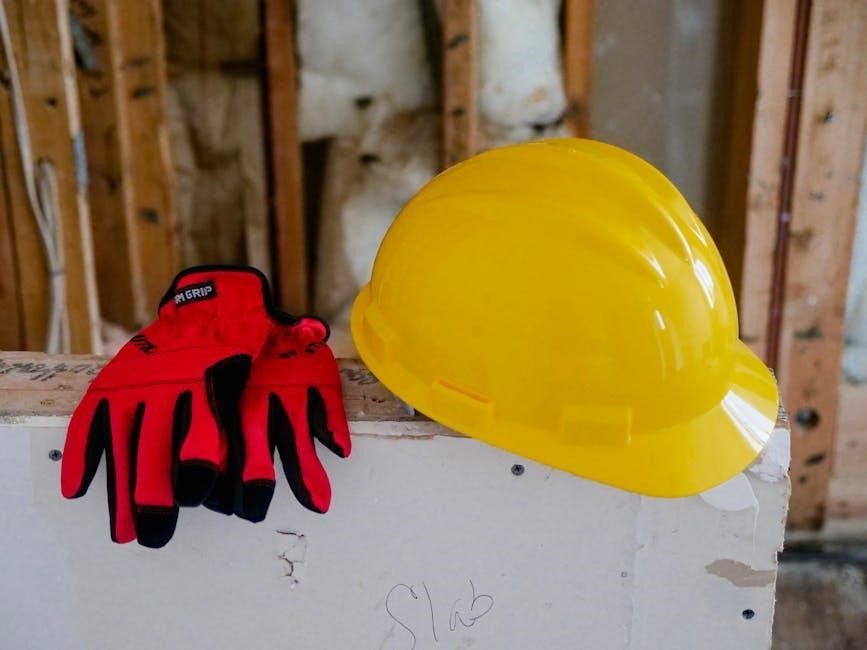
Before installing or operating the Vaillant Ecotec Plus 831, read all safety instructions carefully. This unit is a high‑pressure boiler that requires proper ventilation, gas supply, and electrical connection. Improper handling can lead to fire, explosion, or carbon monoxide poisoning.
Installation: Only a certified professional may install the boiler. Ensure the gas line is shut off during installation. Verify that the venting system meets local codes and is free of obstructions. The boiler must be mounted on a stable, level surface with adequate clearance (minimum 30 cm from walls and 50 cm from the floor).
Electrical Safety: The unit requires a dedicated 10 A circuit with a 250 V supply. Use a residual‑current device (RCD) rated for 30 mA. Do not use extension cords or power strips. Verify that the main circuit breaker is labeled and accessible.
Gas Safety: Connect the gas supply with a pressure regulator set to 0.5 bar. Check for leaks with a soap‑solution test before powering on. If a leak is detected, shut off the gas valve, ventilate the area, and contact a qualified technician.
Ventilation: The exhaust vent must be clear and free of obstructions. Do not cover the vent or install it in a location that could allow back‑drafting. Ensure the vent outlet is at least 1 m above any potential water source.
Carbon Monoxide: Install a CO detector within 2 m of the boiler. Test monthly. If CO rises, evacuate and call emergency services. Follow these measures to protect occupants.
Maintenance: Perform routine checks every 12 months. Inspect the pressure gauge, safety valve, and water level. Replace the filter as recommended. Do not attempt repairs unless you are a licensed service technician. Refer to the full manual for details.

Installation
Prior to installation, verify that all local building codes and utility regulations are met. The Vaillant Ecotec Plus 831 is a high‑pressure boiler that must be installed by a licensed professional. The following steps outline the recommended procedure:
- Site Preparation: Select a location with adequate ventilation and clearance. The boiler should be mounted on a stable, level surface with a minimum of 30 cm of clearance from any wall and 50 cm from the floor. Ensure the area is free of flammable materials and that the floor can support the unit’s weight.
- Gas Connection: Attach the gas line to the boiler using a pressure regulator set to 0.5 bar; Perform a leak test with a soap‑solution; any bubbles indicate a leak that must be repaired before proceeding.
- Ventilation: Install the exhaust vent in compliance with local codes. The vent must be clear of obstructions and positioned at least 1 m above any potential water source. Verify that the venting path is straight and that the outlet is not blocked.
- Electrical Wiring: Connect the boiler to a dedicated 10 A circuit with a 250 V supply. Protect the circuit with a 30 mA residual‑current device (RCD). Use only approved cable types and ensure all connections are secure and properly insulated.
- Water Supply: Connect the water inlet and outlet; Fill the system to the manufacturer’s recommended pressure, typically 1.5 bar at 20 °C. Check for leaks at all joints and fittings.
- Initial Test: Once all connections are verified, perform a pressure test. Observe the pressure gauge for stability and confirm that the safety valve remains closed. If the pressure drops, check for leaks or improper filling.
- Commissioning: After successful testing, the unit is ready for commissioning. Follow the commissioning instructions in the next section to start the boiler and configure the control settings.
Maintain a log of all installation steps and any deviations from the standard procedure. This documentation is essential for future maintenance and warranty claims.
All installation work must be inspected and approved by the local authority before the boiler is commissioned. All components must be installed in accordance with the manufacturer’s installation manual.

Controls and Operation
Operate the Vaillant Ecotec Plus 831 via the front panel; Press the power button to start. Use the mode selector to choose heating or hot water. Adjust the temperature with the +/- knobs. The display shows setpoint and current status. Refer to manual settings. now!!!!
Display and Indicator Lights
The Vaillant Ecotec Plus 831 features a clear, back‑lit LCD that shows the current mode, set temperature, and runtime status. The display updates every second, providing real‑time feedback on heating cycles, water temperature, and error codes. Below the main screen, a series of LED indicator lights convey system status at a glance. The green “Ready” light illuminates when the unit is powered on and ready to accept commands. A yellow “Warning” light flashes when a minor fault is detected, such as a low water pressure or a sensor misalignment. The red “Error” light remains steady during a critical fault that requires service; the accompanying error code appears on the LCD for troubleshooting. A blue “Eco” light indicates that the system is operating in energy‑saving mode, while a white “Boost” light lights up during a temporary increase in heating demand. The display also shows the current date and time, which can be set via the menu. For convenience, a small “Battery” icon appears when the backup battery is low. Users can customize the display brightness through the settings menu, and the system will automatically dim the screen during nighttime hours to reduce glare. All indicator lights are designed to be visible from a distance, ensuring that users can quickly assess the unit’s status without needing to read the LCD. The combination of a numeric display and color‑coded LEDs provides an interface that simplifies operation and maintenance of the Ecotec Plus 831.
Mode Selection and Programming
The Vaillant Ecotec Plus 831 offers a versatile set of operating modes to meet diverse heating needs. Users can switch between “Comfort”, “Eco”, “Boost”, and “Off” directly from the main menu. The “Comfort” mode maintains the set temperature with minimal cycling, ideal for everyday living spaces. “Eco” mode reduces the target temperature by 1–2 °C during unoccupied periods, saving energy while keeping the system ready to respond quickly. “Boost” temporarily raises the heating output for 30 minutes, perfect for sudden temperature drops or when guests arrive. “Off” shuts the unit down entirely, useful during long vacations or for maintenance checks. To program daily schedules, navigate to the “Schedule” submenu, where you can assign start and end times for each mode. Users can also set a “Night” temperature that automatically activates during nighttime hours, ensuring comfort without excessive energy use. Advanced users may enable the “Smart” feature, which integrates with the Vaillant Smart App, allowing remote mode changes and schedule edits via smartphone. The unit records all mode changes in the event log, which can be accessed through the “Diagnostics” screen for troubleshooting or performance analysis. The interface allows quick toggling between modes with a single button press, making adjustments effortless during busy days. The intuitive menu structure and clear visual cues make mode selection and scheduling straightforward for both novices and experienced users.

Maintenance and Service
Regular checks keep the Ecotec Plus 831 running efficiently. Inspect the filter, purge air, and verify pressure. Replace the filter every 3 months, clean the heat exchanger annually, and check the burner for soot. Keep the unit dustfree and ensure proper ventilation!
Filter Replacement
After the replacement, check that the filter housing is sealed and no dust has entered the combustion chamber, as this can affect combustion efficiency and safety. The pre‑burner filter, located behind the front panel, captures dust and particulates that could otherwise clog the combustion chamber. A clogged filter reduces airflow, lowers combustion temperatures, and can trigger the safety shut‑off, potentially causing the boiler to shut down unexpectedly. For optimal performance, replace the filter every three months or sooner if the system operates in a dusty environment. The filter size is 40 × 40 × 10 mm with a depth of 1.5 mm, and it is available from authorized Vaillant distributors. Before starting the replacement, turn off the boiler, allow it to cool, disconnect the power supply, and close the gas valve. Remove the front panel by loosening the four mounting screws, then lift the panel and set it aside. Unscrew the filter cover counter‑clockwise, lift the old filter out, and inspect it for dust accumulation. Insert a new filter, ensuring it is seated flush against the housing, replace the cover, and tighten the screws clockwise. Reinstall the front panel, secure the screws, reconnect the power supply, open the gas valve, and restore the boiler to normal operation. Verify the system’s operation by checking the status indicator; if the boiler remains off or the indicator shows a fault, consult the troubleshooting section or contact a qualified service technician. Regular filter maintenance extends the life of the boiler, guarantees reliable heating performance, and helps maintain indoor air quality by preventing contaminants from entering the combustion air stream.
Cleaning and Inspection
Regular cleaning and inspection of the Vaillant Ecotec Plus 831 ensure safe and efficient operation. Begin by turning off the boiler, allowing it to cool, disconnecting the mains, and closing the gas valve. Remove the front panel by unscrewing the four mounting screws and set it aside. Inspect the combustion chamber for soot buildup; a blackened chamber indicates insufficient airflow or a clogged pre‑burner filter. Use a soft brush to gently remove soot, taking care not to damage the chamber lining. Check the heat exchanger for corrosion or cracks; any visible damage requires professional repair. Inspect the flue pipe for blockages or corrosion; clear debris with a flexible brush or vacuum. Verify that the pressure relief valve is free of obstruction and that the pressure gauge reads within the manufacturer’s specified range. Inspect the condensate drain for clogs; clear with a long, flexible brush or a wet‑dry vacuum. Examine the condensate pump for proper operation; ensure the pump motor is not overheating and that the impeller is free of debris. Inspect all electrical connections for corrosion or loose terminals; tighten as necessary; Finally, replace the filter, reassemble the front panel, reconnect power, open the gas valve, and restore the boiler to normal operation. Perform this inspection every six months or after any major fault to maintain optimal performance and safety. This procedure should be repeated monthly to ensure consistent performance. Daily Check.
Technical Specifications
Model 831 delivers 9.5 kW output, 3.5 kW condensing, 1.5 kW auxiliary. Dimensions 520 mm×350 mm×400 mm, weight 45 kg. Rated at 230 V/50 Hz, 2 kW max. Includes 3‑stage fan, 2‑stage burner, 0.5 kW condensing pump. Warranty 2 years. Rated for 3‑year warranty, 5‑year serv
Dimensions and Weight
The Vaillant Ecotec Plus 831 is engineered for compact installation while delivering robust performance. Its external dimensions are 520 mm in height, 350 mm in width, and 400 mm in depth, allowing it to fit comfortably in standard wall cavities or dedicated units. The unit’s overall footprint is 0.52 m × 0.35 m × 0.40 m, translating to a total volume of approximately 0.073 m³. This compact form factor benefits smaller dwellings or retrofit projects where space is limited. Weight specifications are critical for structural support calculations. The Ecotec Plus 831 weighs 45 kg (99 lb) when fully assembled, including all internal components and the heat exchanger. This weight is distributed evenly across the mounting plate, ensuring minimal stress on the wall or support structure. For installations requiring a floor mount, a dedicated base plate is supplied, designed to accommodate the same weight distribution while providing stability. Mounting options are versatile. The unit can be installed in a wall‑mounted configuration using the supplied mounting brackets, or it can be placed on a floor or pedestal mount with the optional base plate. The wall mount requires a minimum clearance of 200 mm above the unit for airflow and maintenance access. The floor mount must be positioned on a level surface with a minimum clearance of 150 mm on all sides to facilitate ventilation and service. For HVAC professionals, the unit’s dimensions and weight are integral to planning the layout of the heating system. The compact size allows routing of piping and electrical connections, while weight ensures that residential studs or commercial framing can support the unit without reinforcement.
Electrical Requirements
The Vaillant Ecotec Plus 831 requires a dedicated 230 V, 50 Hz single‑phase supply with a minimum current rating of 16 A. The unit’s internal power consumption is 4.2 kW at full load, translating to a peak demand of 18.3 kVA. A properly sized circuit breaker or fuse must be installed in accordance with local electrical codes, typically a 20 A circuit breaker for residential installations. The supply cable must be rated for 3 mm² copper conductors, providing adequate current capacity and minimizing voltage drop over typical run lengths of up to 10 m. Grounding is mandatory; the unit’s metal chassis must be bonded to the building’s grounding system using a 4 mm² copper conductor. For safety, the supply must be connected to a residual‑current device (RCD) with a trip rating of 30 mA. The unit’s internal wiring is designed for a maximum ambient temperature of 40 °C; installation should avoid exposure to direct sunlight or heat sources. The Ecotec Plus 831 is compatible with both European and North American voltage standards, but the supplied transformer must be selected accordingly. When integrating into a smart home system, the unit can be powered via a 12 V DC adapter, but this mode is reserved for diagnostic purposes only. All electrical connections should be performed by a qualified electrician, and the system must be tested for correct voltage, continuity, and insulation resistance before first use. The manufacturer recommends periodic checks of the supply voltage and current draw to ensure the unit operates within specified limits and to detect any potential electrical faults early. Failure to adhere to these electrical requirements may result in reduced efficiency, premature component failure, or safety hazards. The installation must comply with local electrical regulations, and the system should be inspected annually by an electrician!

Warranty and Support
Vaillant guarantees the Ecotec Plus 831 against manufacturing defects for a period of five (5) years from the date of purchase. This warranty covers all internal components, including the heat pump unit, control board, and associated electronics, provided the system is installed, operated, and maintained in accordance with the manufacturer’s instructions. The warranty does not cover damage resulting from improper installation, unauthorized modifications, or failure to adhere to the recommended maintenance schedule. For service, customers may contact the authorized Vaillant service center via phone or email. A service request must include the serial number, proof of purchase, and a brief description of the issue. Vaillant’s support team will schedule a technician visit within 48 hours for urgent cases or within 5 business days for non‑critical issues. All repairs performed by authorized personnel will be covered under warranty if the fault is due to a defect in materials or workmanship. If the warranty period has expired, customers may opt for a paid extended warranty plan, which extends coverage for an additional three (3) years. The extended plan includes priority service, discounted parts, and a dedicated support hotline. For international customers, Vaillant provides a global warranty network; however, service times may vary by region. The warranty does not cover consumables such as filters, refrigerant, or electrical components that wear out with normal use. Detailed warranty terms and conditions can be found in the printed manual or on Vaillant’s official website under the ‘Warranty’ section. For any warranty claim, customers should retain all receipts, service records, and documentation of the issue. Failure to provide required documentation may result in denial of the claim. Vaillant remains committed to delivering reliable heating solutions and encourages users to keep the system’s firmware up to date to maintain optimal performance and warranty eligibility.
Vaillant support is available!
Remote Monitoring and Smart Features
Vaillant’s Ecotec Plus 831 integrates a proprietary IoT platform that allows real‑time monitoring and remote control via the Vaillant Smart Home app. The unit connects to the home network through a built‑in Wi‑Fi module, using WPA2‑Enterprise for secure authentication. Once paired, the app displays live data streams: indoor and outdoor temperatures, humidity, system pressure, and energy consumption in kilowatt‑hours. Users can set temperature schedules, adjust set‑points, and receive push notifications for events such as low refrigerant, high fan speed, or filter replacement reminders. The system also supports voice assistants (Amazon Alexa, Google Assistant) through a dedicated skill, enabling voice‑activated temperature adjustments and status queries. For advanced users, the API exposes diagnostic logs, allowing integration with third‑party home‑automation platforms via MQTT or REST. Remote firmware updates are delivered over the air, ensuring the unit stays current with the latest performance optimizations and security patches. All data transmitted is encrypted with AES‑256, and the device’s firmware is signed to prevent unauthorized modifications. The app’s dashboard includes a historical trend graph, enabling users to analyze monthly energy usage and identify savings opportunities. In case of a fault, the app provides a troubleshooting wizard that guides the user through basic checks before scheduling a service call. The remote monitoring feature is fully compliant with GDPR, giving users control over data sharing preferences and the ability to delete stored logs.

Contact and Service Centers
For assistance with the Vaillant Ecotec Plus 831, please contact Vaillant’s global support network. The primary customer service line is +1‑800‑VAILLANT (1‑800‑828‑3748) and is available 24 / 7. Email support is available at support@vaillant.com, with a guaranteed response within 48 hours. For local service, use the Vaillant Service Locator on the official website; enter your postal code to find authorized technicians, service centers, and spare‑parts distributors within a 50‑mile radius. Each authorized center is certified to perform installation, maintenance, and repair according to Vaillant’s quality standards. For warranty claims, submit a claim form through the online portal or call the warranty hotline at +1‑800‑VAILLANT‑WARRANTY (1‑800‑828‑3749). All service centers are equipped with the latest diagnostic tools and firmware updates, ensuring that your unit receives the most up‑to‑date support. For international customers, Vaillant offers a global service network; visit the “Service & Support” page on vaillant.com to find your nearest partner. If you experience a critical fault, use the “Emergency Service” button in the Vaillant Smart Home app to request immediate assistance. All service agreements include a 12‑month maintenance plan covering filter checks, system diagnostics, and priority scheduling. For additional resources, consult the online FAQ, troubleshooting guides, and video tutorials available on the Vaillant knowledge base. For any queries, contact Vaillant customer support +1‑800‑VAILLANT‑CS!